Blog

![]() The following instructions are for setting MX records on the Plesk hosting platform.
The following instructions are for setting MX records on the Plesk hosting platform.
Before altering your MX records ensure you have listed all your email addresses with us, our servers will refuse all messages sent to unknown recipients.
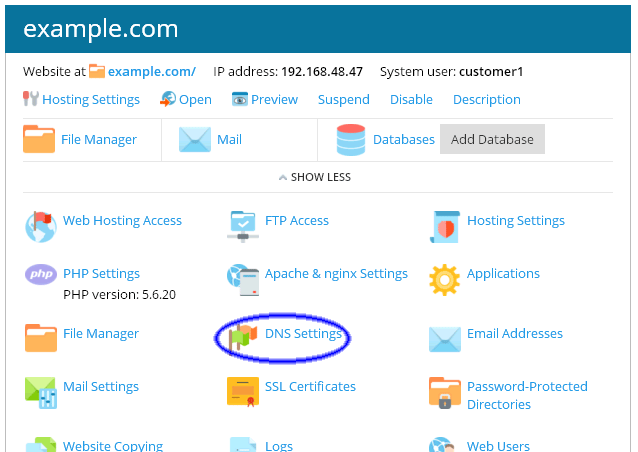
Select the DNS Settings option for your domain.
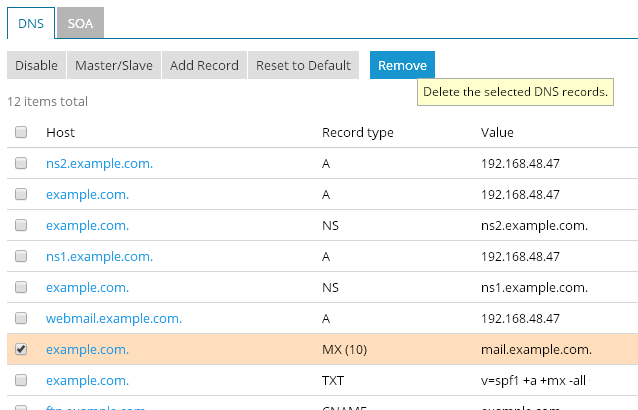
Remove any existing MX records for your domain, you will be replacing them with our MX records in the next step.
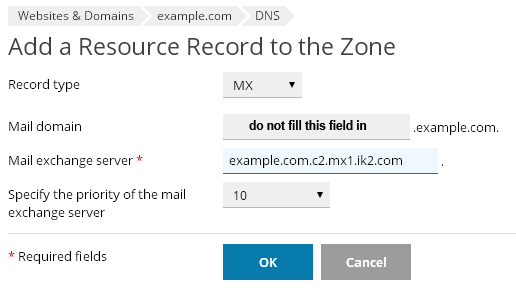
Use the Add Record button and add three new MX Records , using the settings in the table below, this will direct your incoming mail to our network of servers. When adding new MX records you must leave the mail domain section blank.
| MX records are specific to individual domains, please login to view the MX servers for your domain. |
With three new MX records added to your DNS server, save your changes using the update button at the top of the page.
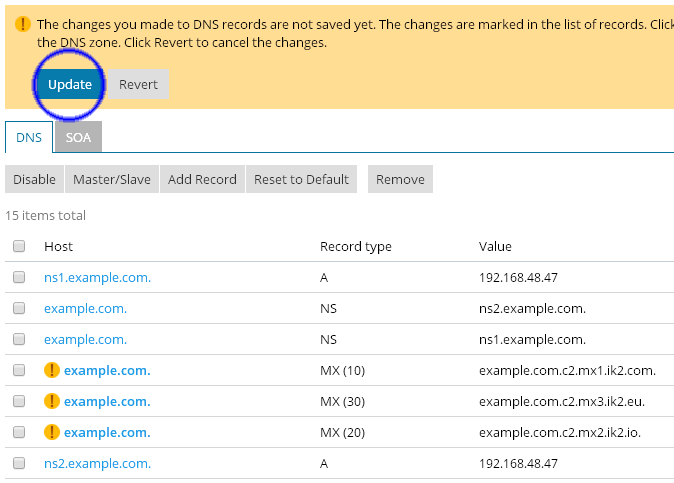
You should end up with three records with a record type of MX as seen in this sample screen shot.
Changes to your MX records may take 24 - 48 hours before all computers on the Internet see the update, your spam levels will slowly decrease during this time.

Updated 2016/06/18