Blog

The following instructions are for setting your MX records when hosting with IX webhosting, originally written in 2009.
Recently (late 2015) customers attempting to activate MX Guarddog's email security service with IX webhosting have not been successful.
We have seen an email loop being created where messages bounce back and forth between MX Guarddog and IX webhosting. IX webhosting is able to correct the issue by modifying a setting on their servers (something to do with LDAP). Please open a helpdesk case with IX webhosting and contact us if we can be of assistance.
If your DNS is managed by IX webhosting, but your email is hosted elsewhere (i.e. your own server at your office) or another ISP these instructions would still be valid.
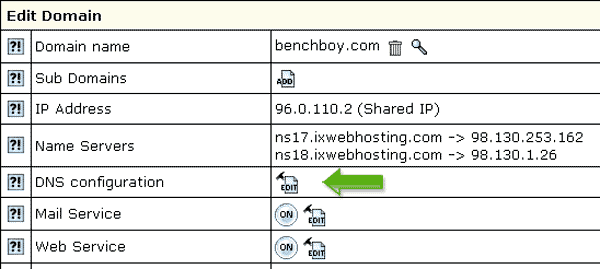
Delete the existing MX records, by clicking the trash icon.

Add three new MX Records, using the settings in the table below. Ensure you leave the name column blank when adding new MX records.

| MX records are specific to individual domains, please login to view the MX servers for your domain. |
You should end up with three mx records under the Custom MX Records which show your new MX records for the MX Guarddog servers.

Changes to your MX records may take 24 hours before all computers on the Internet see the update, your spam levels will slowly decrease during this time.
Updated 2015/08/02