DreamHost MX Record Setup

DreamHost Logo

Step #1

  • Prior to changing the MX records for your domain ensure you have listed all your email addresses with MX Guarddog. You must define all email addresses at your domain, regardless of type. Messages sent to unknown users are returned to sender, do not leave any valid addresses out.
  • Login to your DreamHost control panel.

Step #2

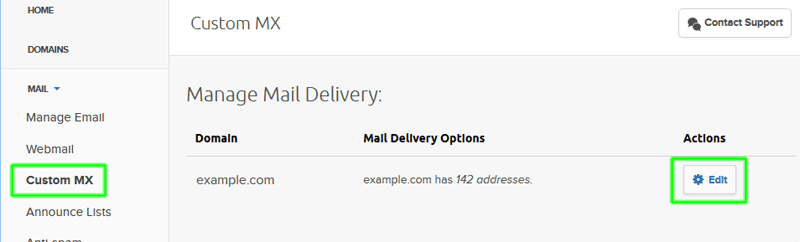
  • Click Custom MX from the navigation panel, then the Edit action for the domain you are setting up.

Step #3

  • Under the Custom MX Records section, enter the three MX Servers assigned to you from the table below.

    MX records are specific to individual domains, please login to view the MX servers for your domain.

  • Ensure the checkbox is selected to indicate that you will check your email at DreamHost. If you do not select this option, DreamHost will not accept mail for your domain.
  • Take note of the value listed as DreamHost MX Records. In our example below the value is mx1.sub5.homie.mail.dreamhost.com your value may be different. This is the email server that DreamHost has assigned to you. Enter this value on MX Guarddog's Your Email Servers page - this is where we will forward your clean email.
  • Press the blue button labeled 'Change this domain to use Custom MX records now!' to save your changes.

Setup Complete

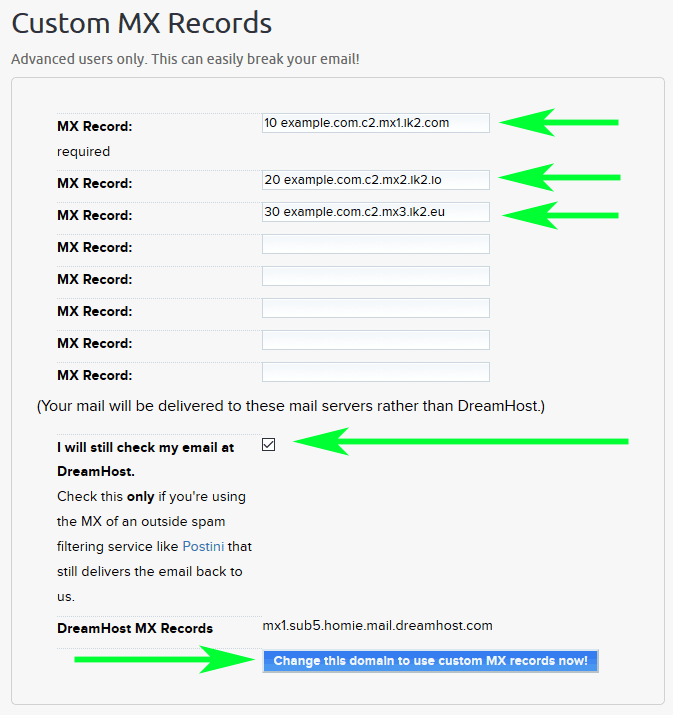
You should end up with three MX Records which direct email for your domain to our servers. We will process and forward clean mail to the server you specify on the Your Email Servers page.

Changes to your MX records may take 24 hours before all servers on the Internet see the updates, your spam levels will slowly decrease during this time.

DreamHost also publishes their own set of instructions for using a 3rd party MSP (Mail Service Provider), the most recent setup insttructions by DreamHost are found here.

Updated 2016/09/29